For my first day, I knew we would do some sort of icebreaker to get people introduced to each other. However, I did not expect that to be playing with Legos. To Rolex’s credit, it worked really well: I got acquainted with my classmates, we got to joke and ease the tension a bit, and the activity forced us to communicate and work as a group. My group got together to design a watch with the Legos we had, and after that switched to altering other groups’ designs while they altered ours. Once we were more comfortable and settled in, we quickly got introduced to Rolex’s curriculum and began the introduction to micromechanics, complete with tools, technical documents and raw materials for shaping.
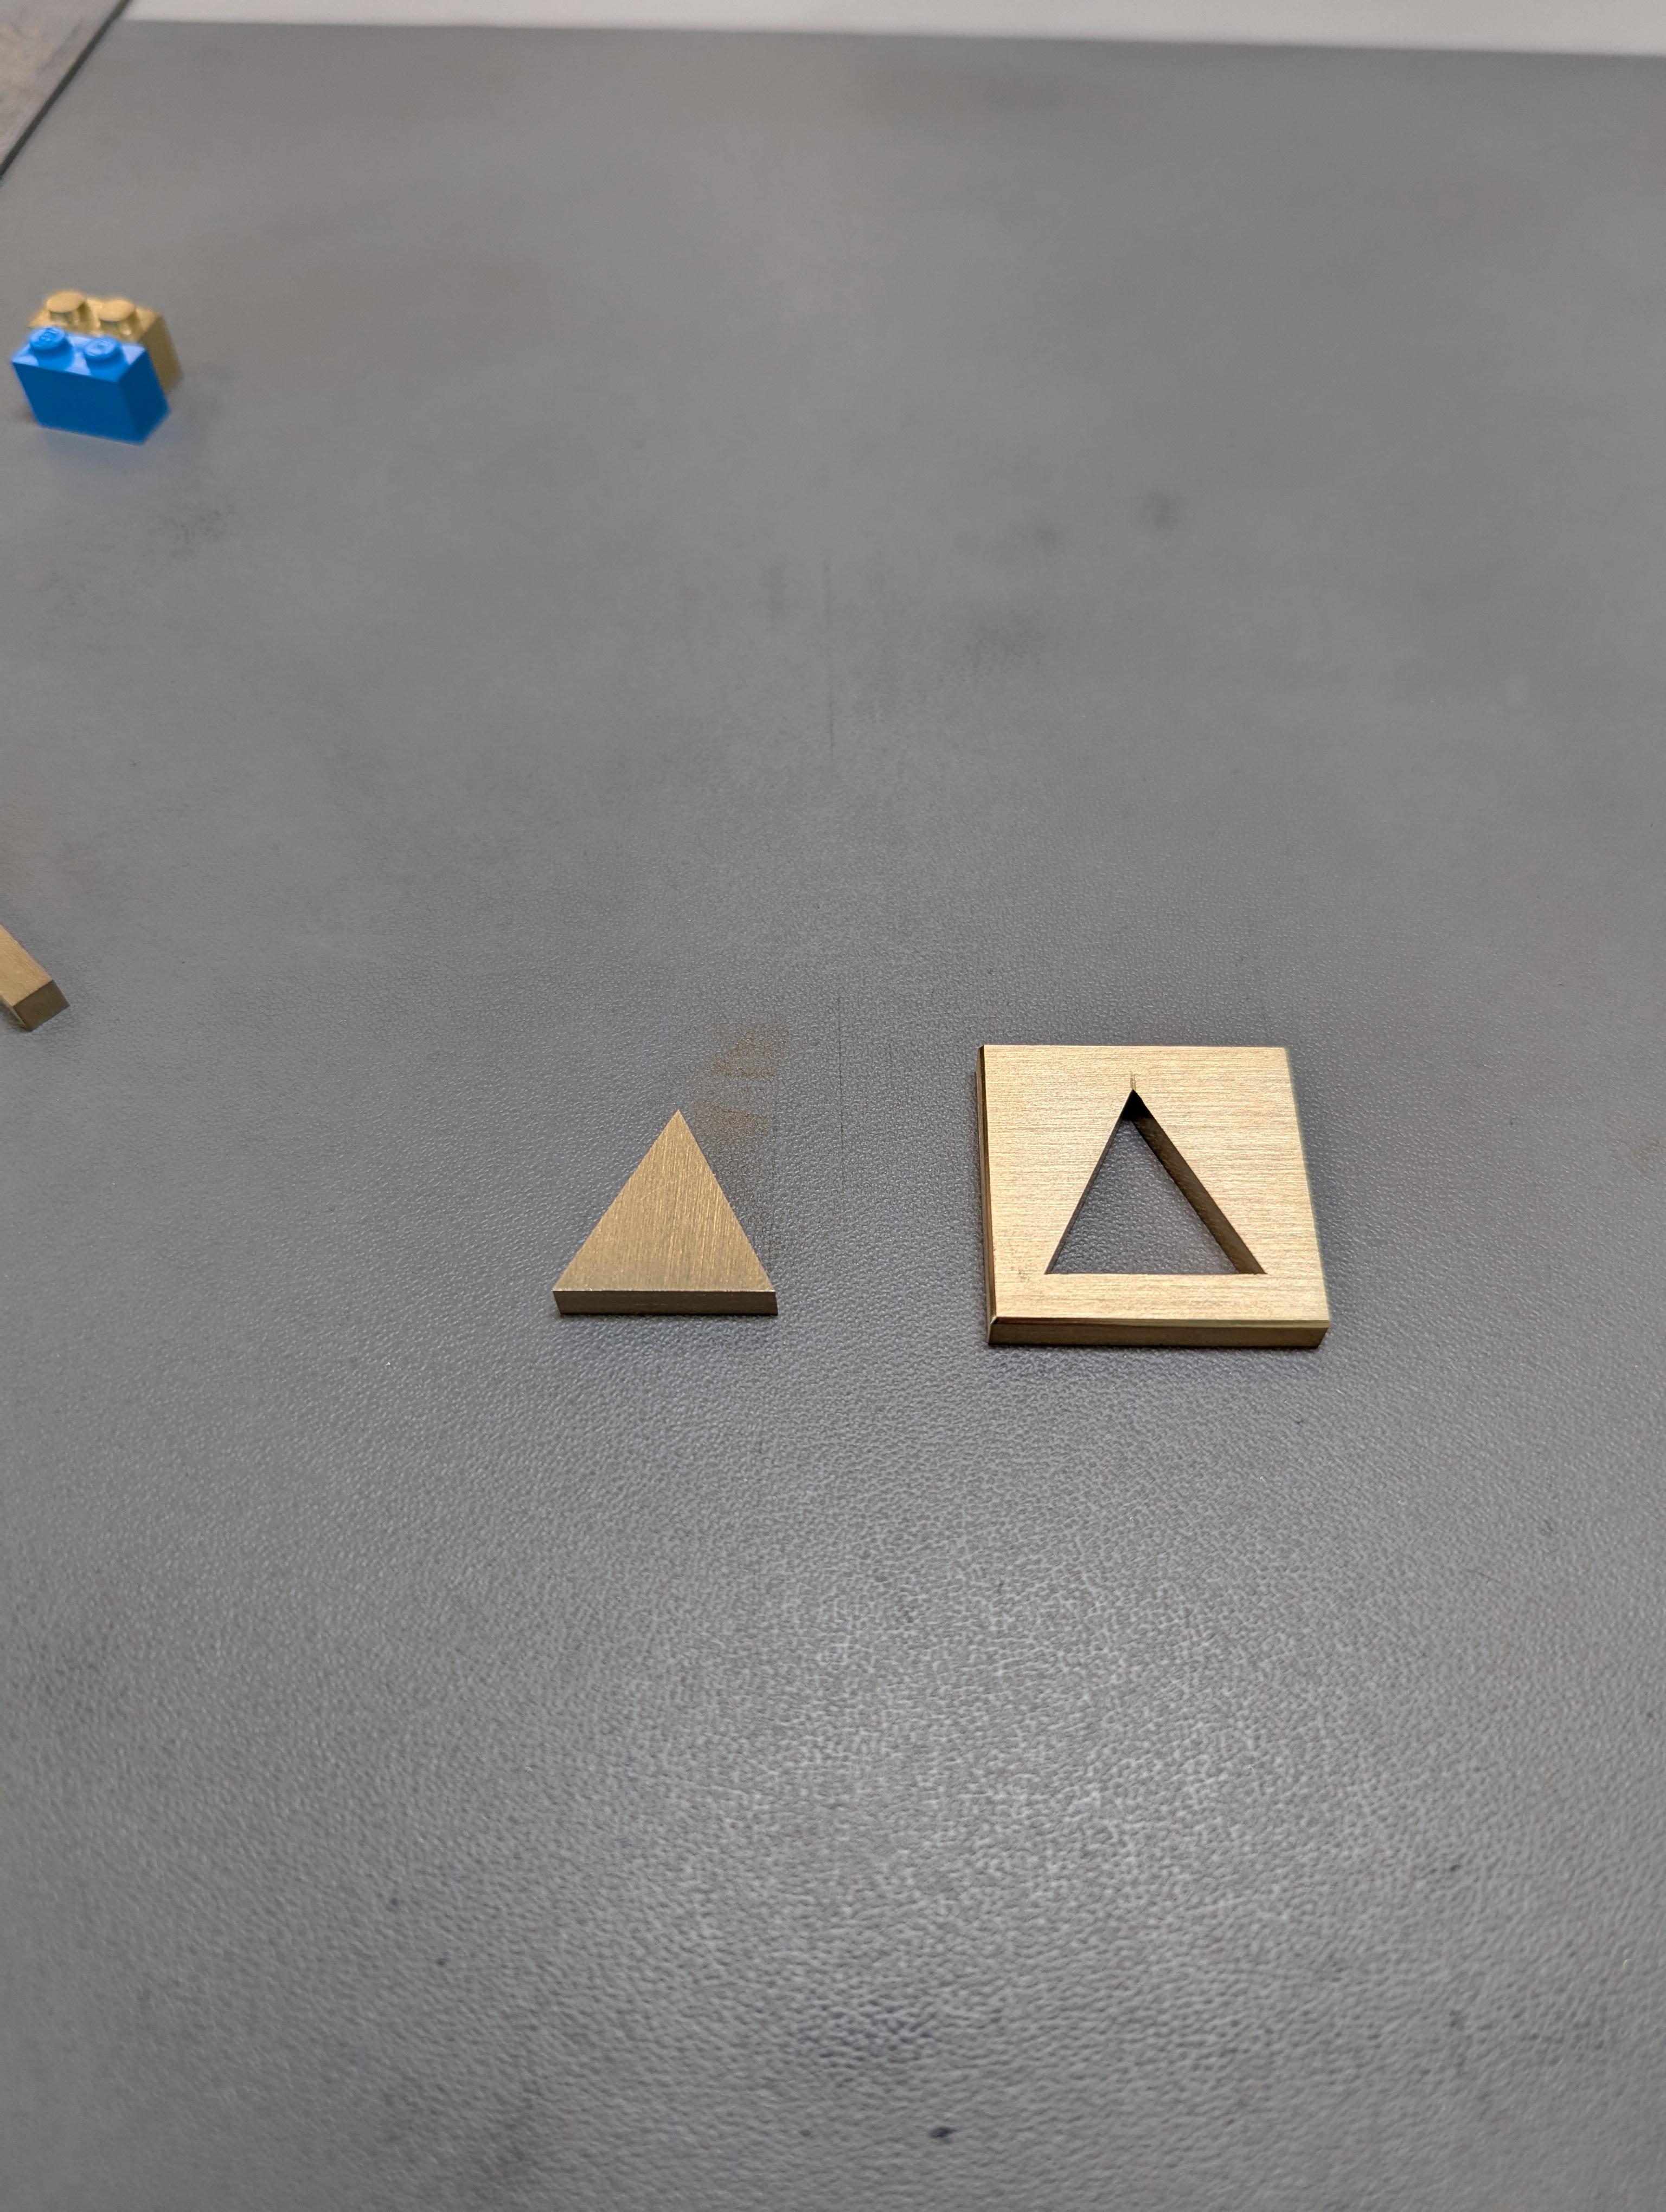
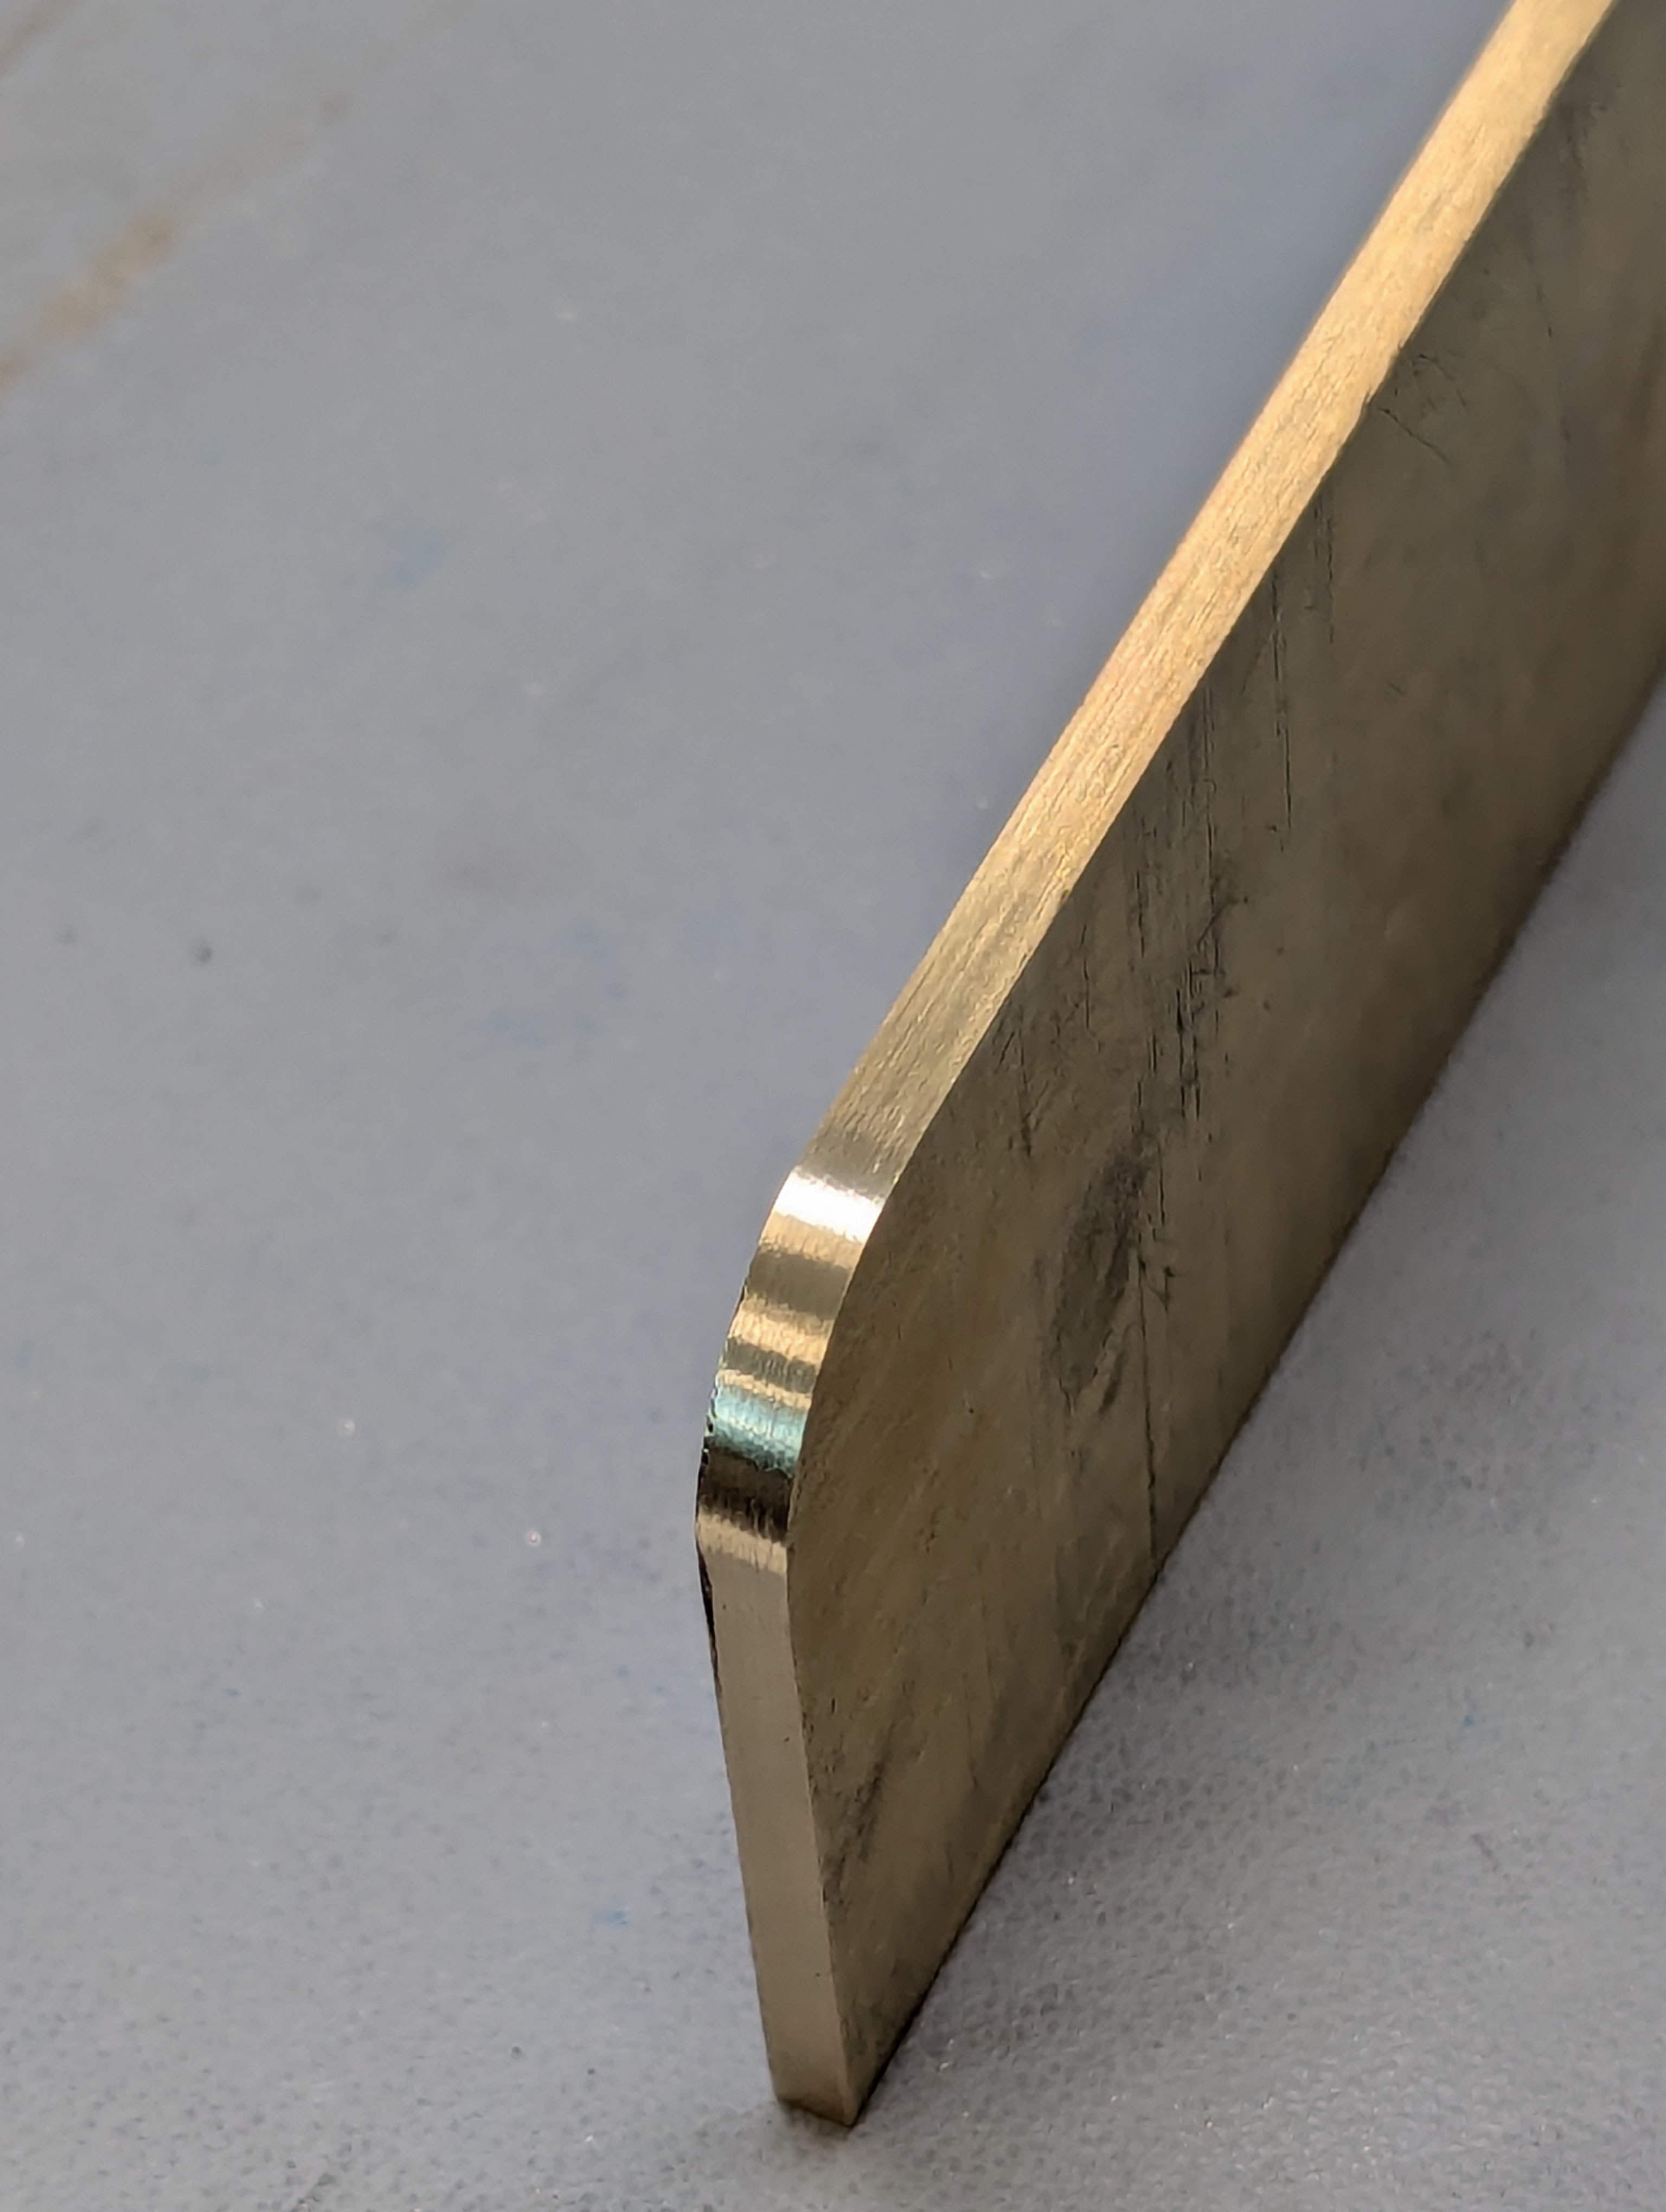
One of the practice pieces prior to the exam. Focused on cutting sharp corners, fabricating a puzzle piece to fit in our square, and attention to details. It was important to get the corners as tight and square as possible to minimize how much material needed to be shaved off and to ensure a better function of the puzzle piece.
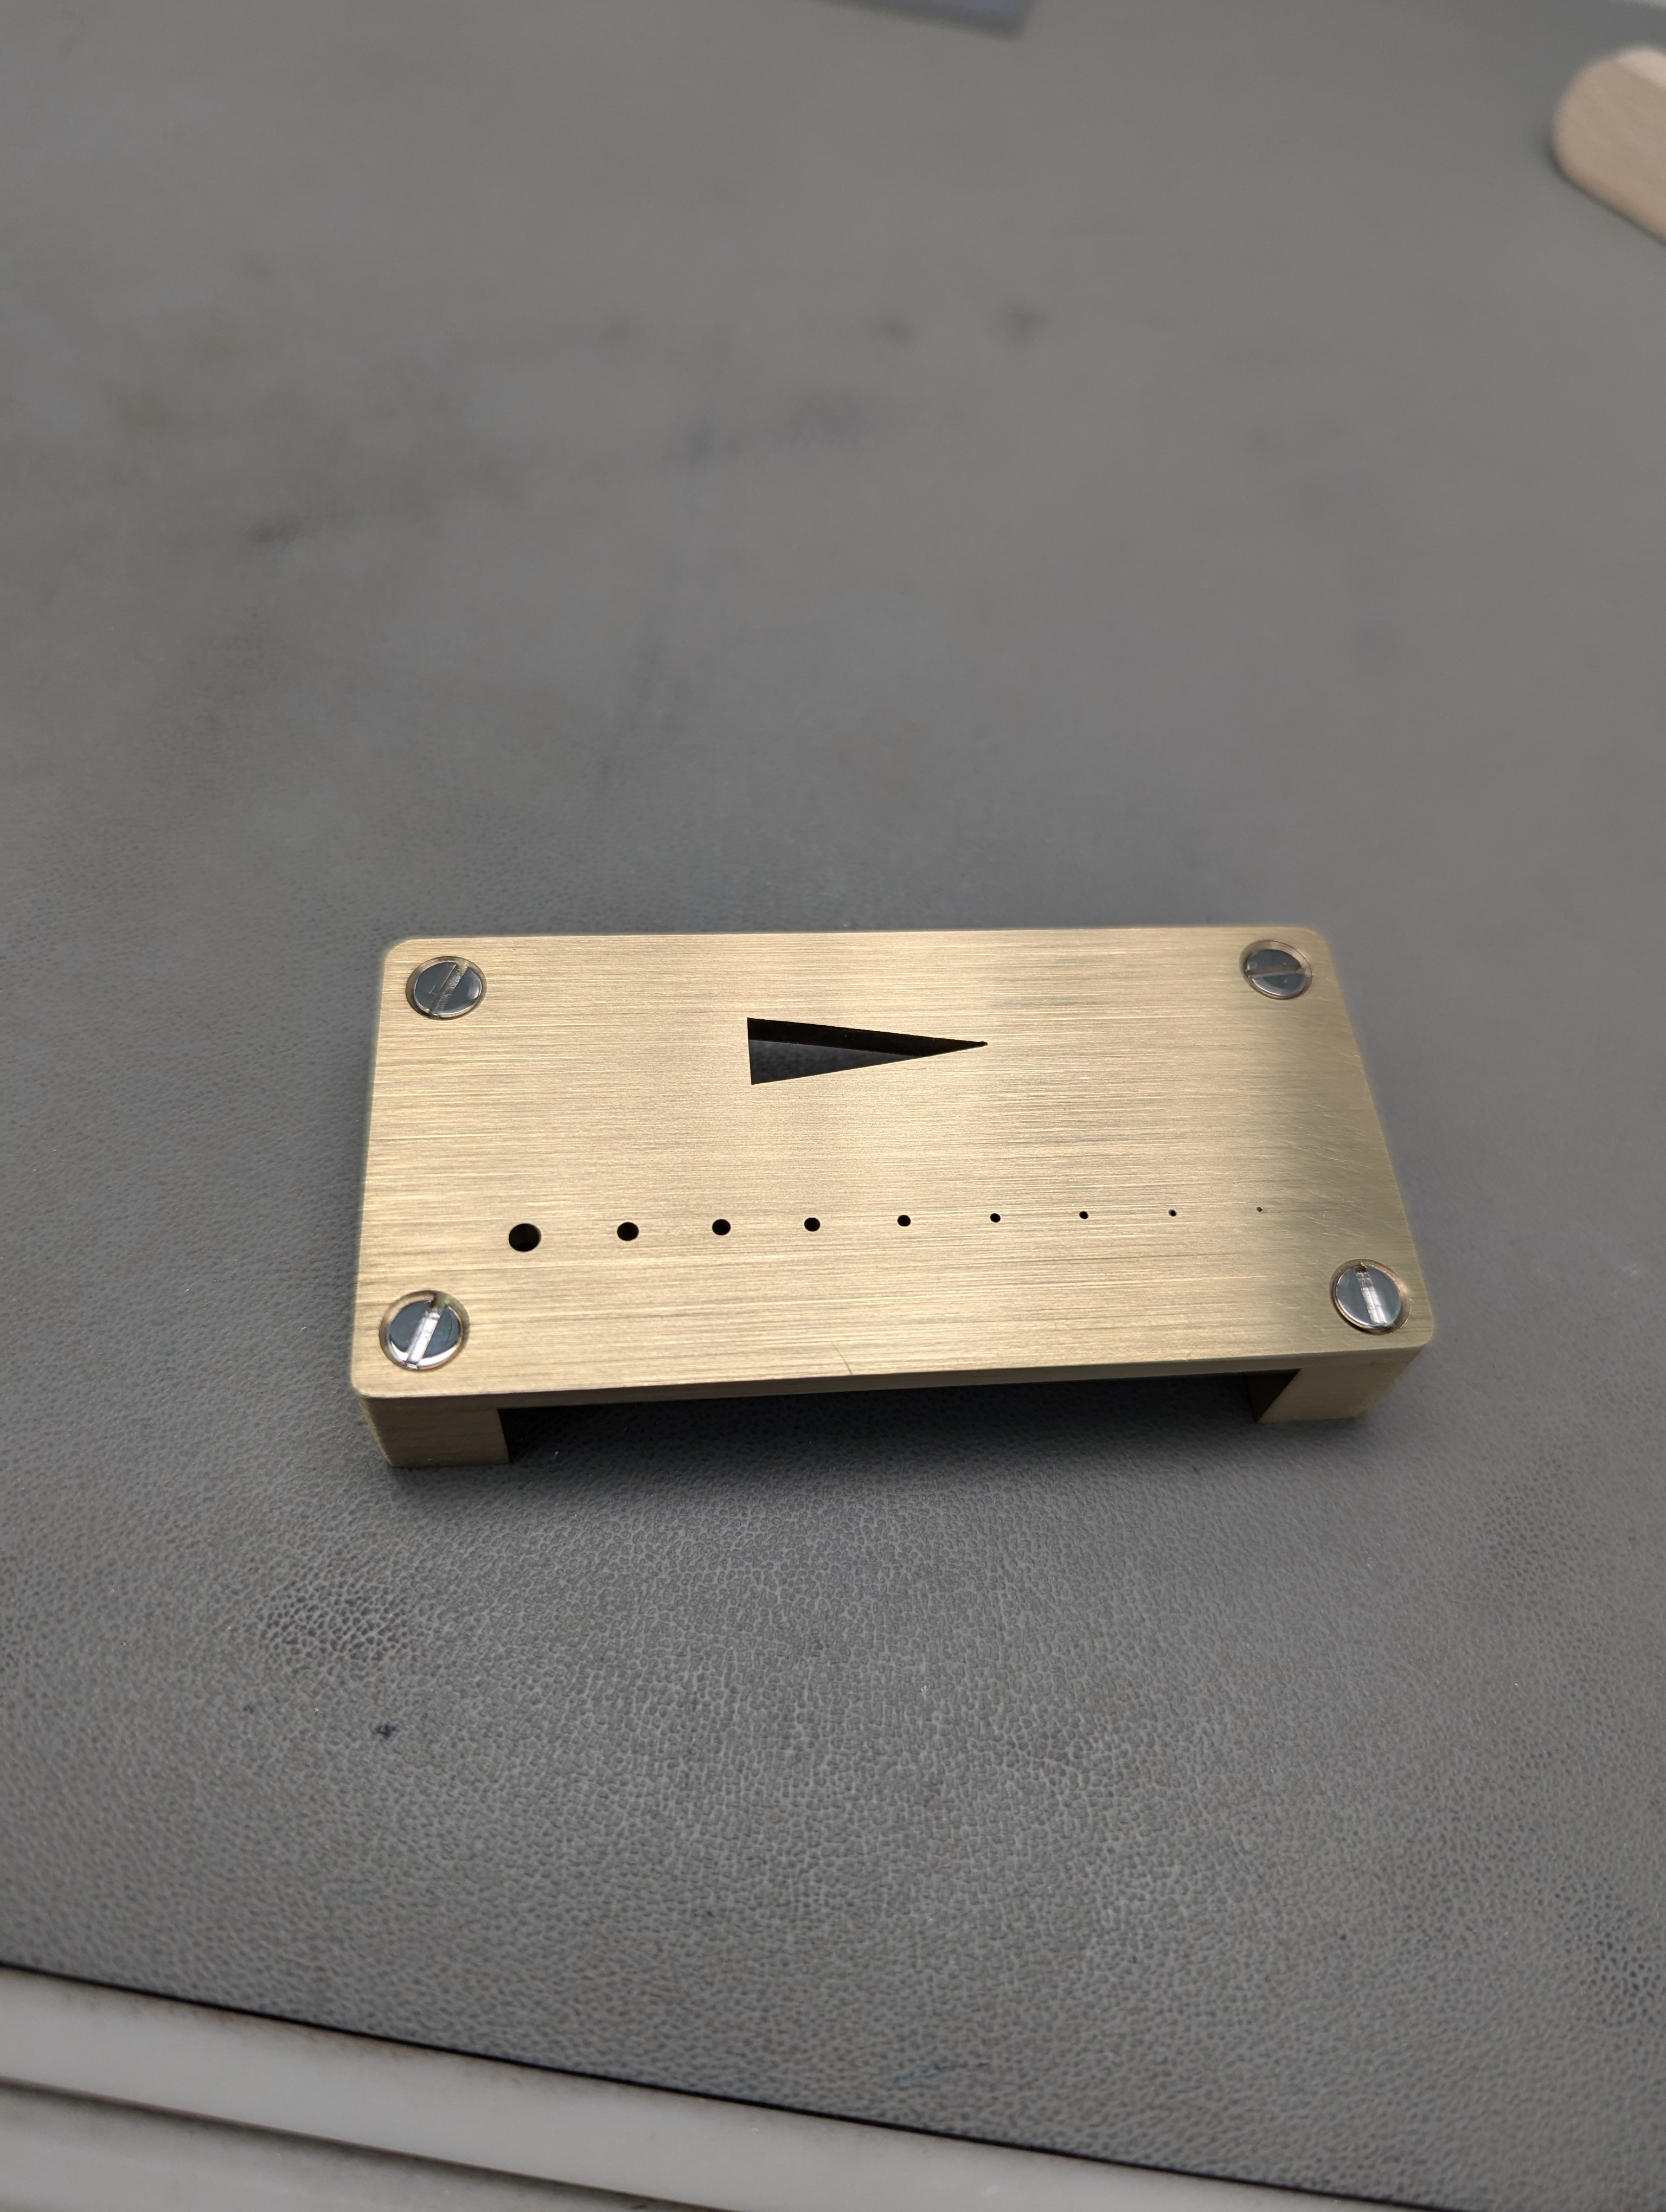
One of the tools we fabricated: the riveting stake. Fully functional tool with removable legs, polished screws and a uniform satin finish all around. This will prove to be a useful tool in the future, both inside and out of school!
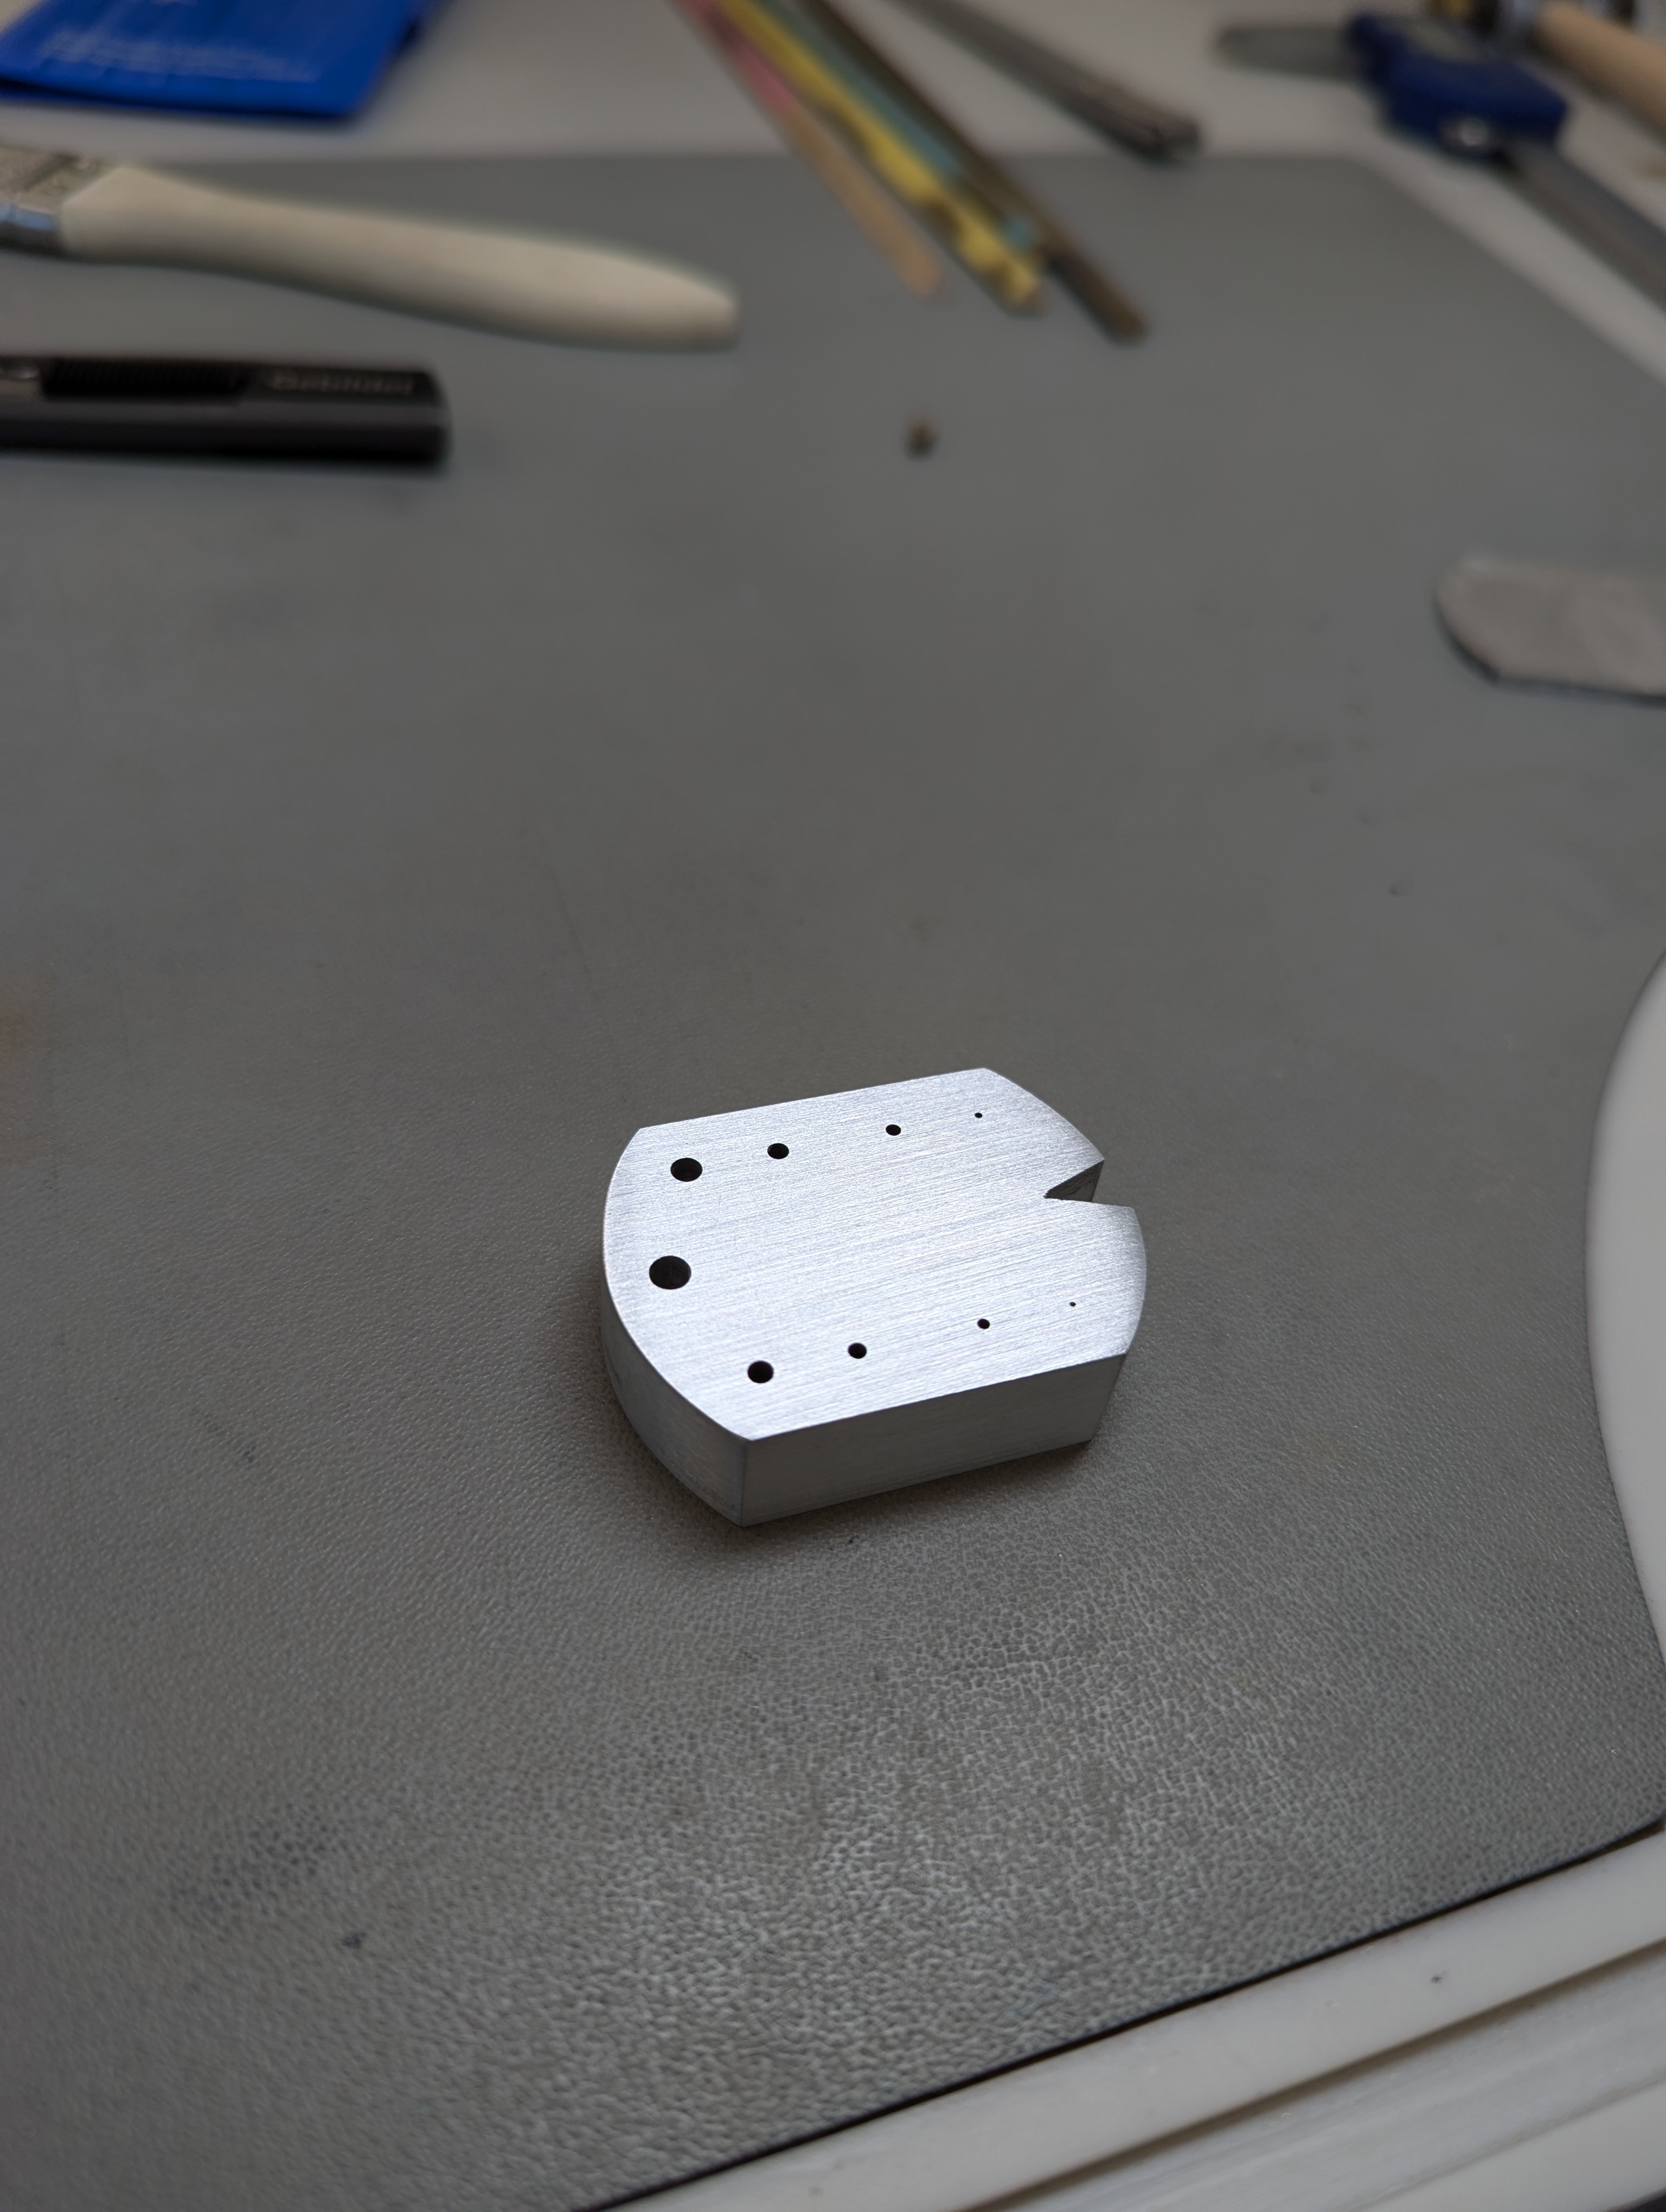
The anvil, another tool we manufactured for future use. Making this out of aluminum instead of brass introduced many new challenges during fabrication. The aluminum was much stickier than brass and generated more heat, which led to prolonged cutting times and made saw blades more prone to snapping. Also, excessive exposure to aluminum dust can cause symptoms of “metal fume fever”, which led to us using N95 masks for the first time in the classroom.
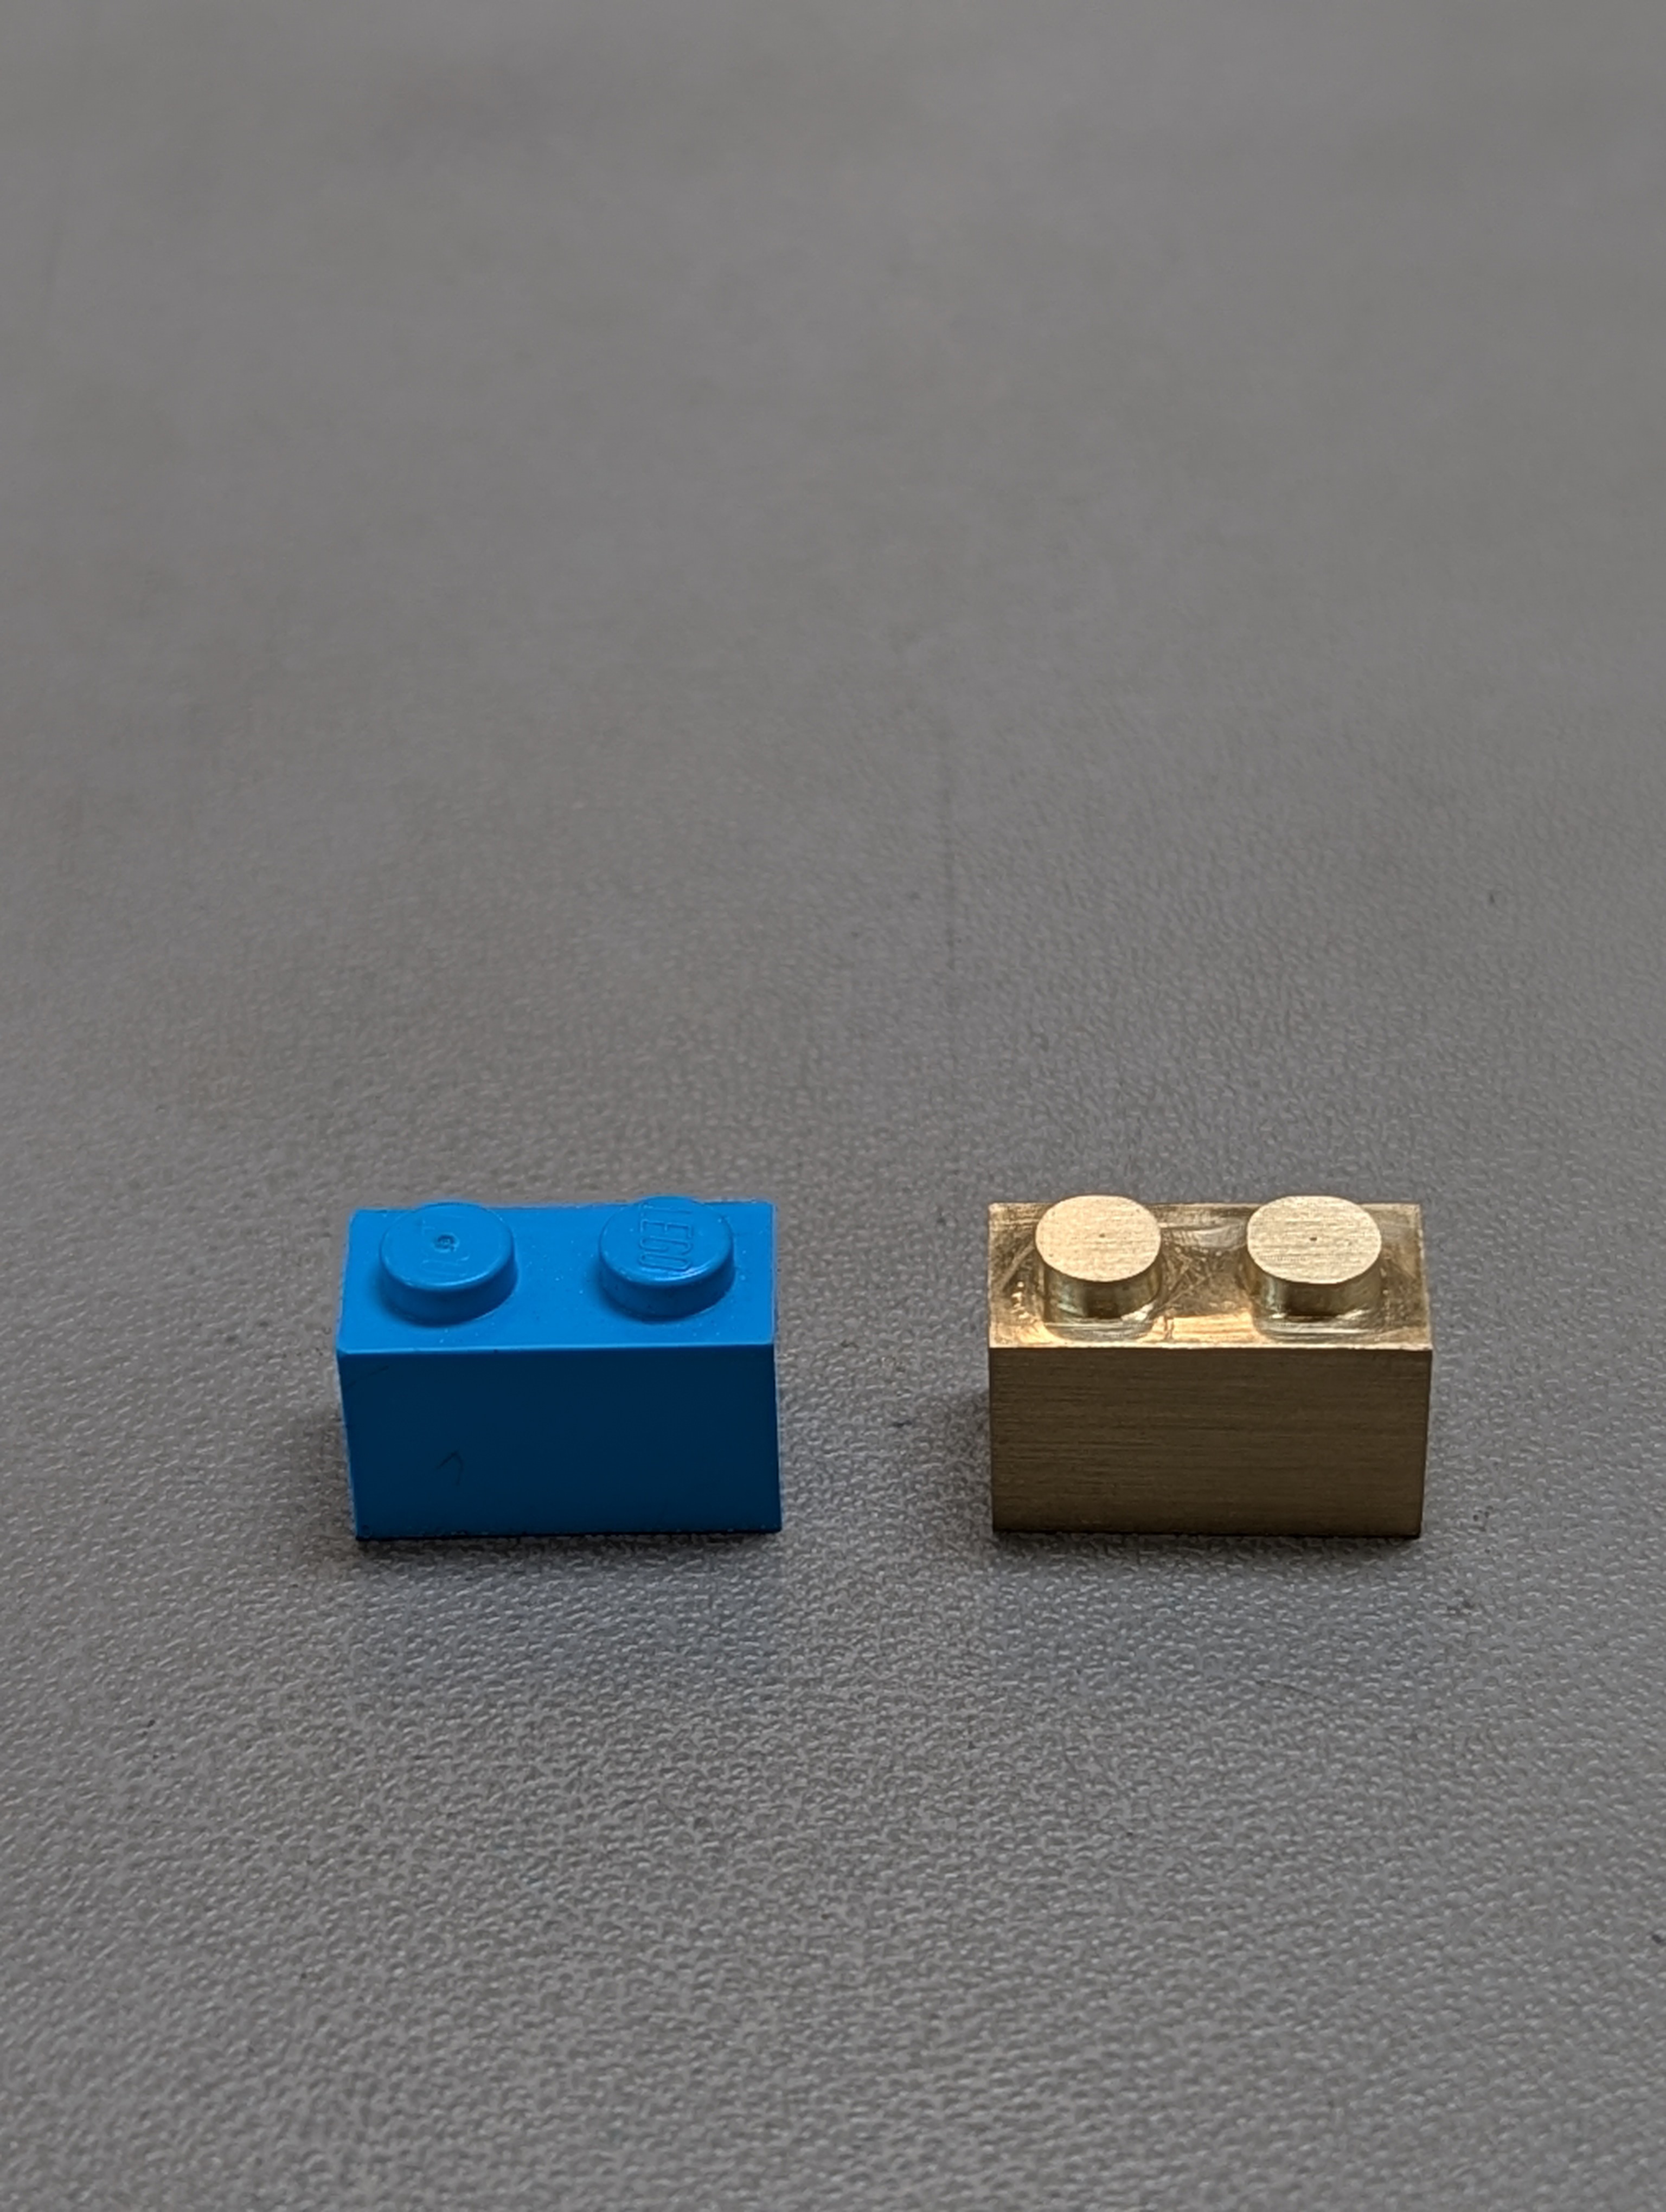
Finally, our personal project. I chose to make a 1:1 functional Lego brick based off the very first technical drawing we made. This was one of the more challenging pieces I made due to its size and strict tolerances to ensure functionality. The pips were the hardest part, as I wanted them to be as concentric and finished as possible while also not making them so thin that it affects the proportions and functionality of the piece.
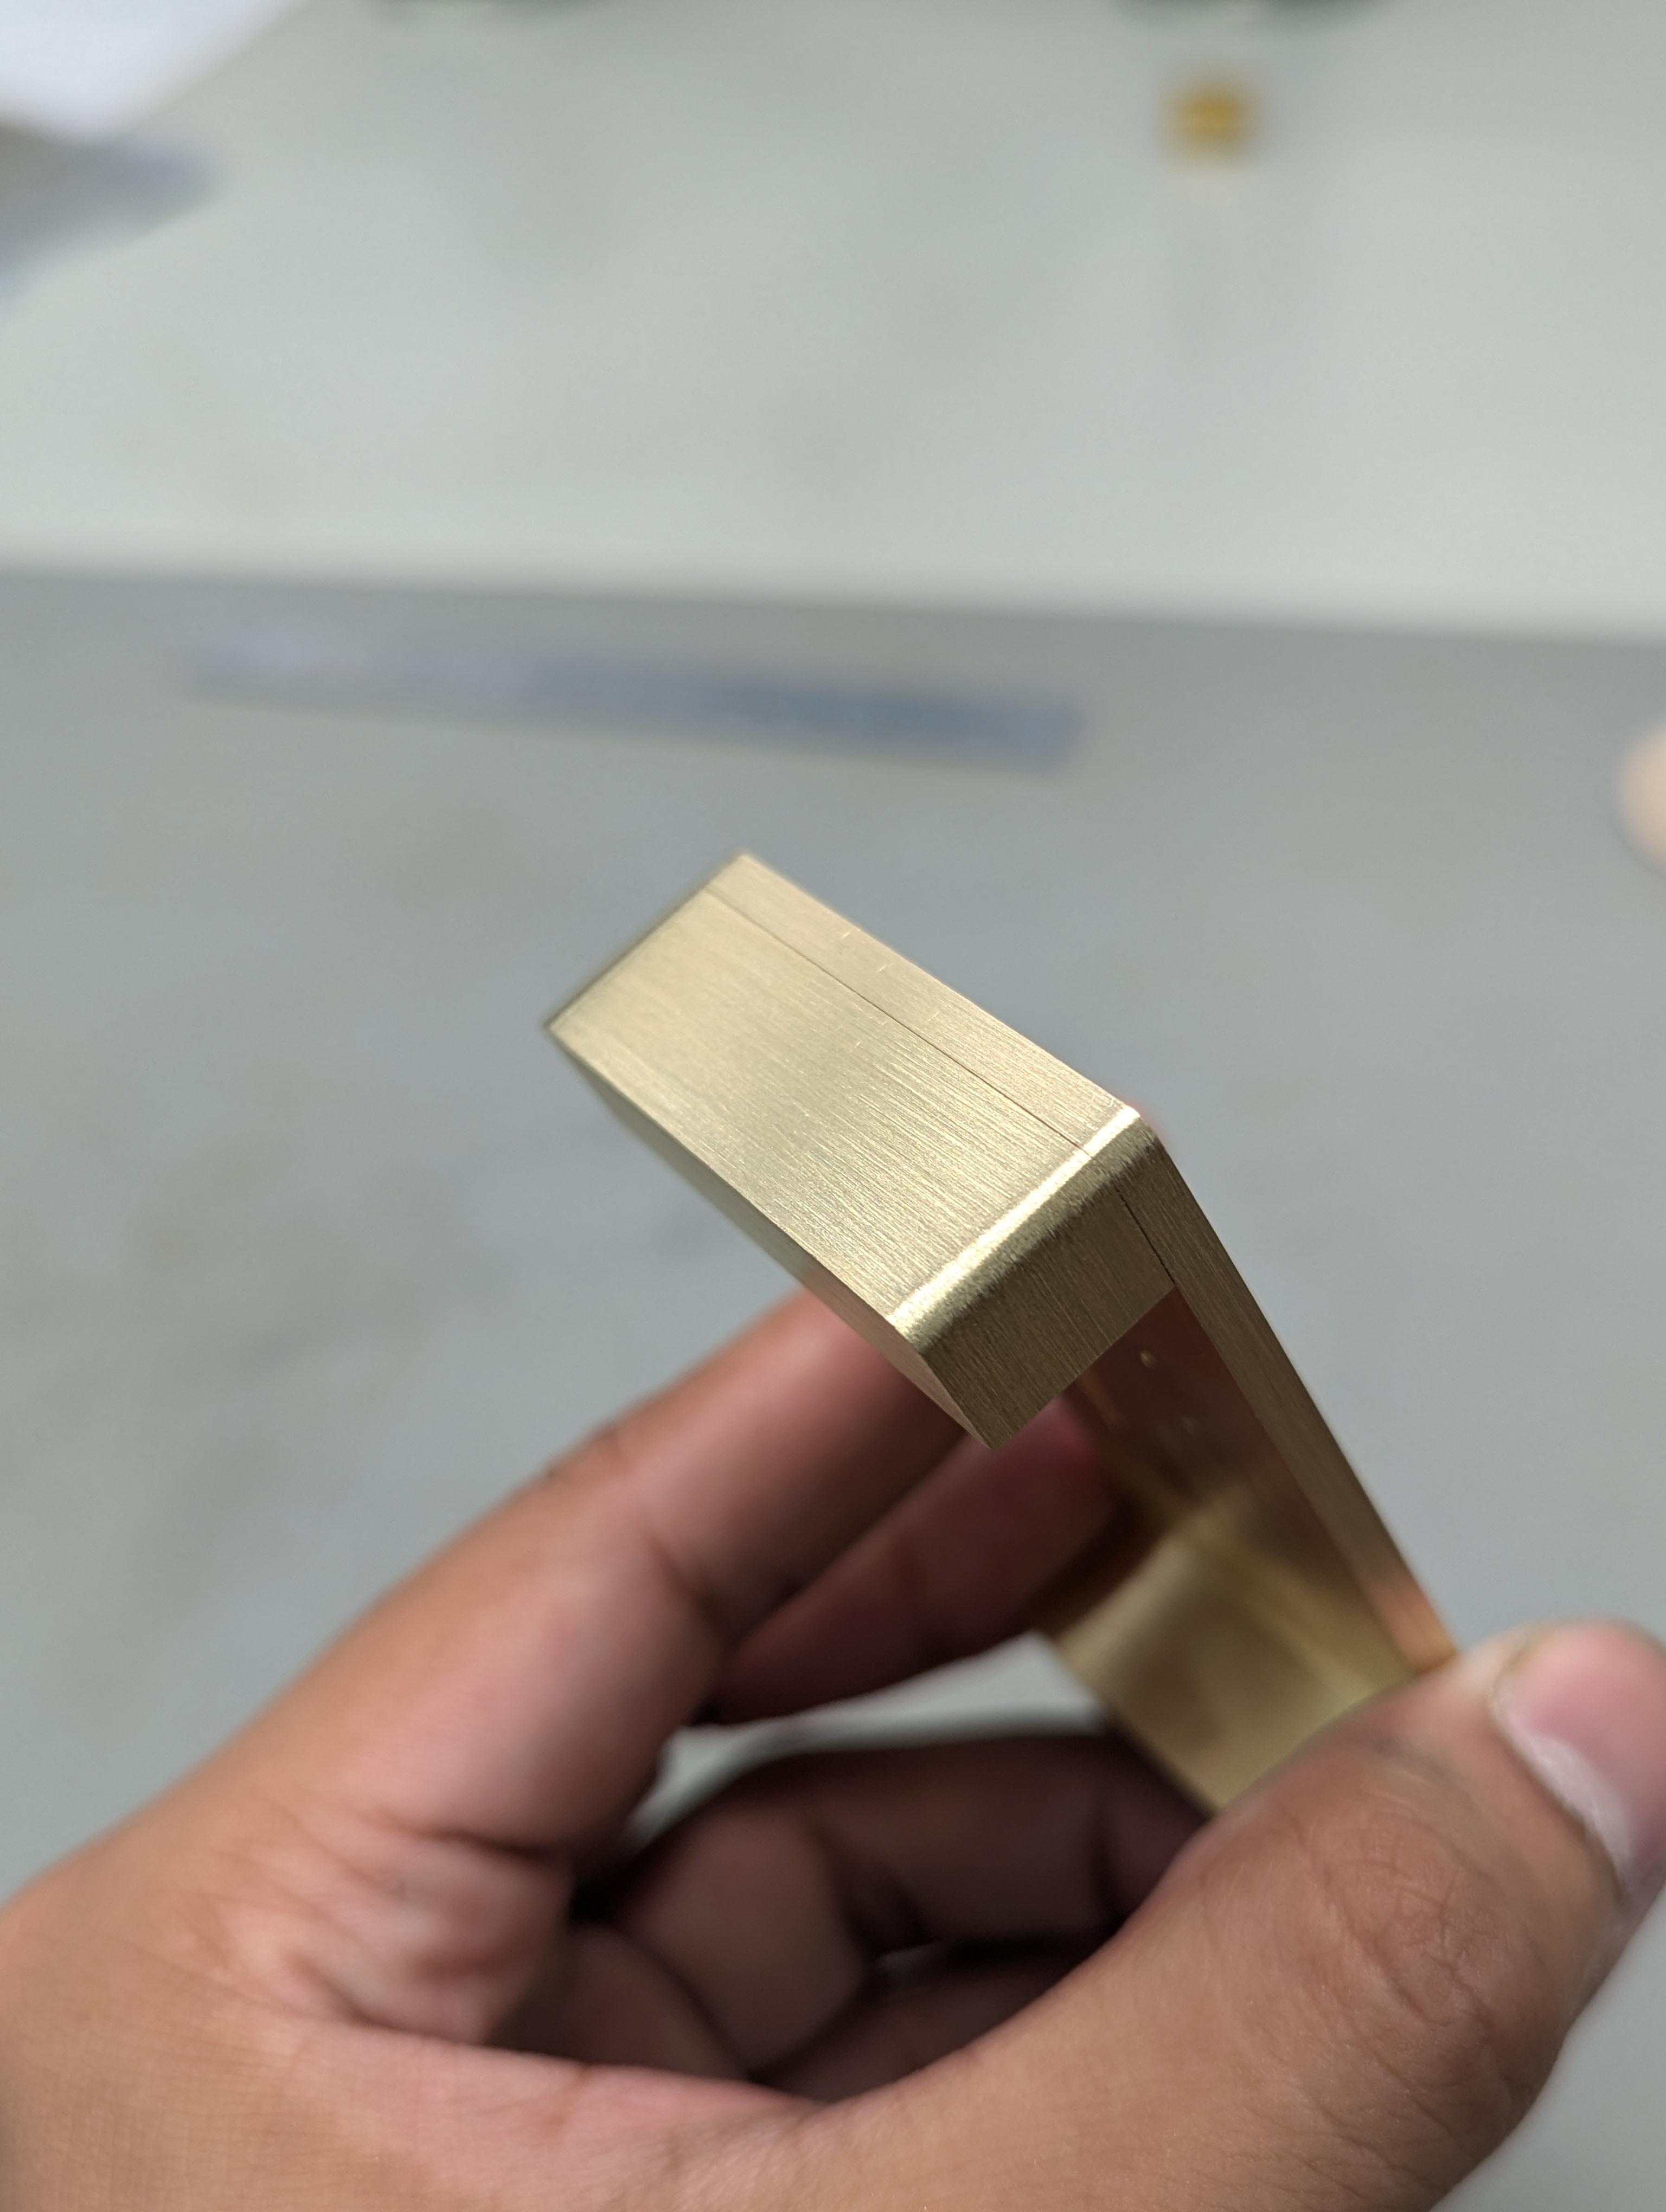
Right: my finished riveting stake, complete with squared edges, rounded corner and consistent satin finish. I was very proud of this finish, as it helped the piece look much more refined and complete.
At the end of micromechanics, I was very proud to see my development in such a tangible way. My work got cleaner and more refined, and I felt prouder and more confident in the work I did. I did come up short on my IE1, however, scoring .2 points lower than on my practice due to a misinterpretation of some important dimensions. This was quite the letdown for me personally, but I tried my best not to dwell on my mistakes. If anything, that shift to trying to focus on the next steps instead of ruminating helped reinforce how much progress I had made.

Leave a comment